Audacity - Recording and Playback
Audacity is a professional grade audio editor and recorder. It is
relatively easy to get started with, but has many complicated and
powerful features available to professionals.
Import audio
The first thing you need to start using audacity is some audio.
There are two ways to get audio into audacity, record it from a
microphone (more on that in a bit) or import an existing track.
For now, lets use the import feature to get this FLAC encoded track into audacity.
Once you've saved the file to the disk, open Audacity and select File
-> Import -> Audio... and choose the file from your disk.
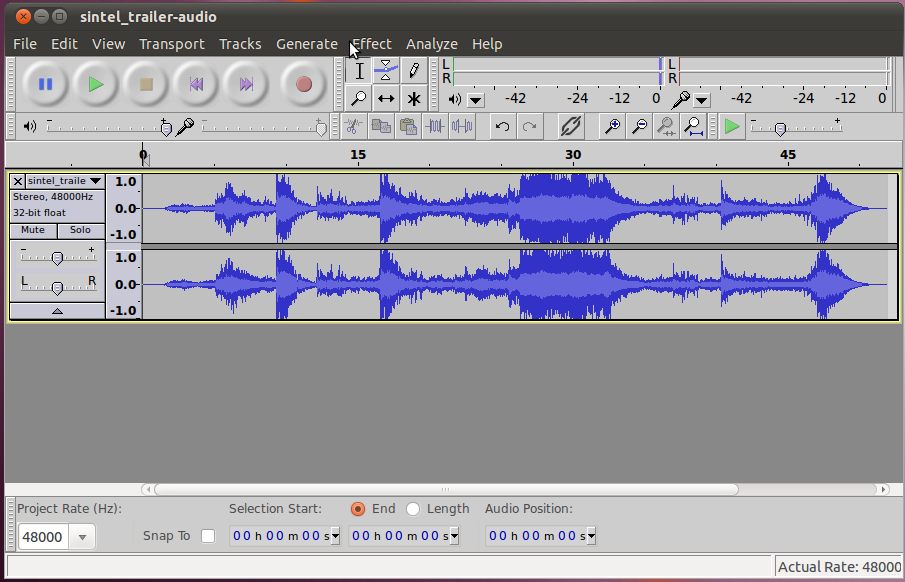
It will take a second to convert the file from FLAC to the native
editing format (44.1kHz, 32-bit float), then you will see its
"waveform" in the window.
Play Back Audio
Once you have it open, you can play it back to hear what it sounds
like. Just click the green play button, to start. The blue
pause button to the left of the play button will halt the
playback. The yellow stop button to the right of the play button
will stop playback and re-set it to the beginning.
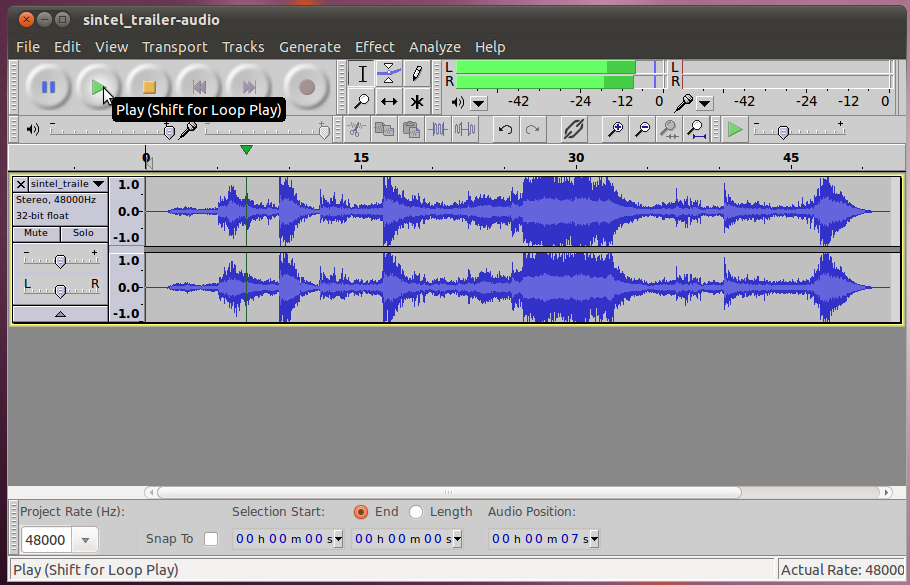
You will see that the cursor moves along with the audio as it is
played. Just under the play button is a slider that will let you
control the volume of the playback. On the same line as the play
button, but further to the right you will see two green bars (labeled
L&R for Left and Right channels) which show the level of volume
that is being played at that instant.
Zoom in and out.
If you want to understand better what exact part of a waveform you are
working with (this will be very important when we get into editing),
you will need the ability to zoom in on small parts of the track.
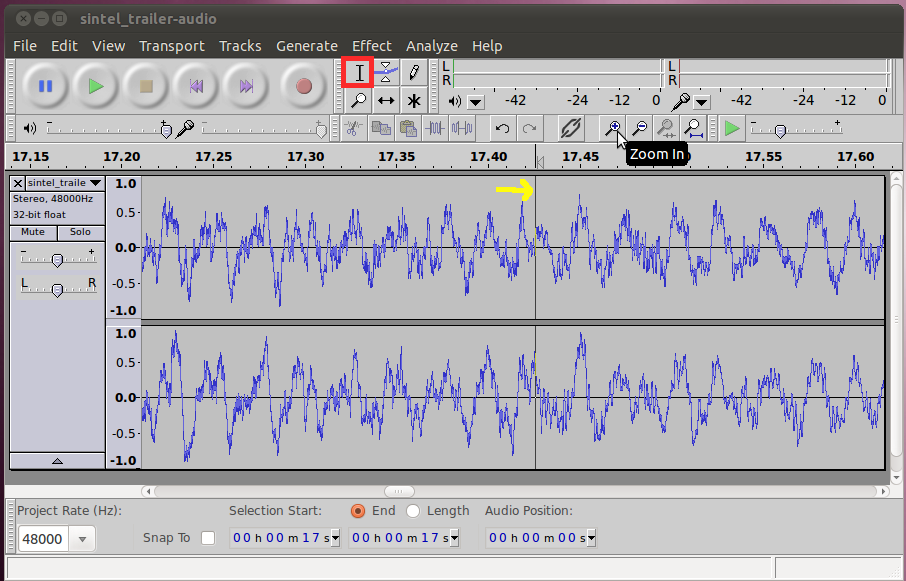
There are several different ways to do this in audacity. The
first is in selection mode (when the selection cursor icon is active,
to the right of the record button). To zoom in selection mode
click on the track at the spot that you want to zoom in (this will put
a vertical line at that spot), then click the magnifying glass with the
plus sign (+) on it until you are close enough.
If you want, you can move the vertical line in between any of the zoom
steps, or zoom back out (the button to the left of the zoom in button,
with the minus sign on it), move it and zoom back in.
Sometimes you have a particular section that is important, and want to
zoom in to the point that the section of interest fills the
screen. It might take several tries to get it just right by
picking a spot, zooming in, updating the spot, etc. However,
there is an easier way. To start we will use the selection tool
to make a selection. Click the start of the section you are
interested in and drag the cursor to the end of the section. As
you move, the area you are selecting will be come darker gray,
indicating that it is selected.
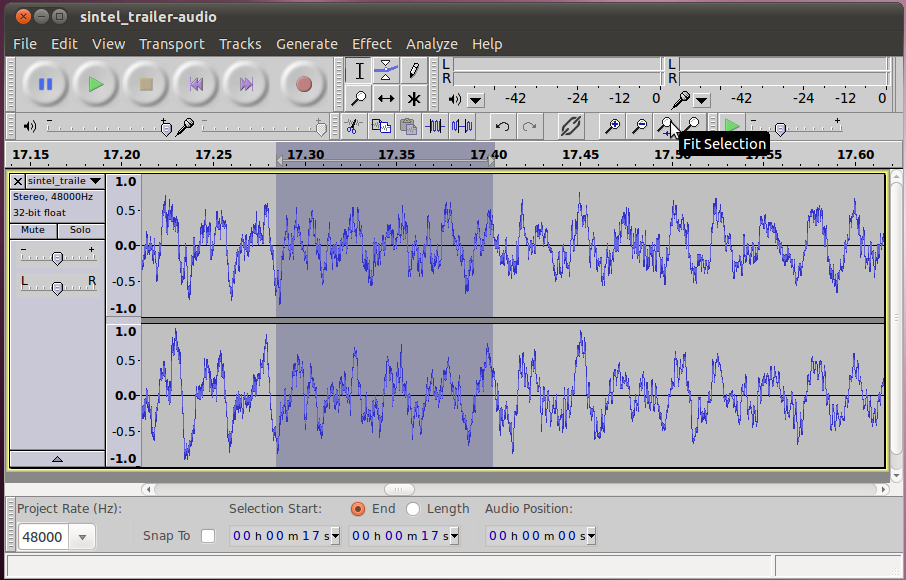
Once you have the correct area selected, we simply click the "Fit
Selection" button, which is immediately to the right of the zoom out
button.
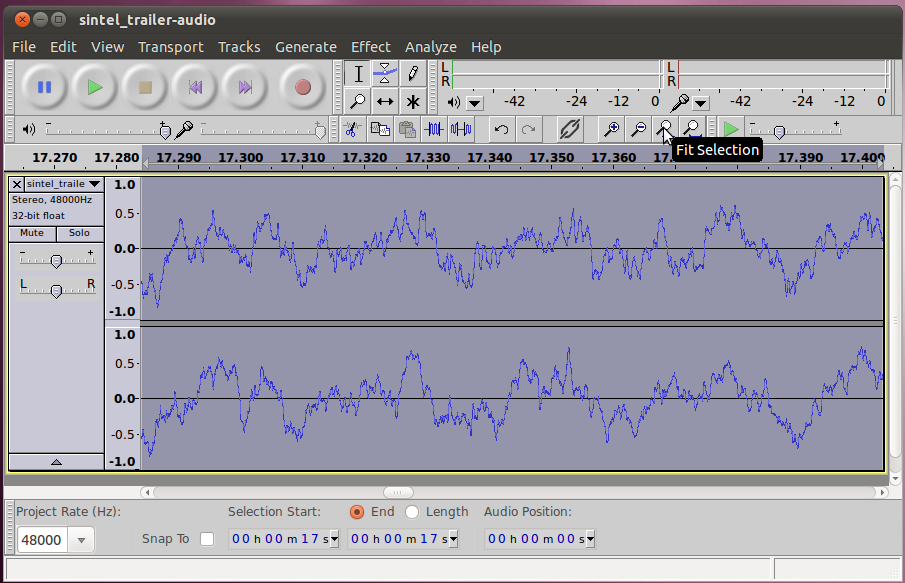
You will then see that your selection takes up the whole screen.
If you ever want to get back to seeing the whole project at the same
time, you can click the "Fit Project" button, immediately to the right
of the Fit Section button.
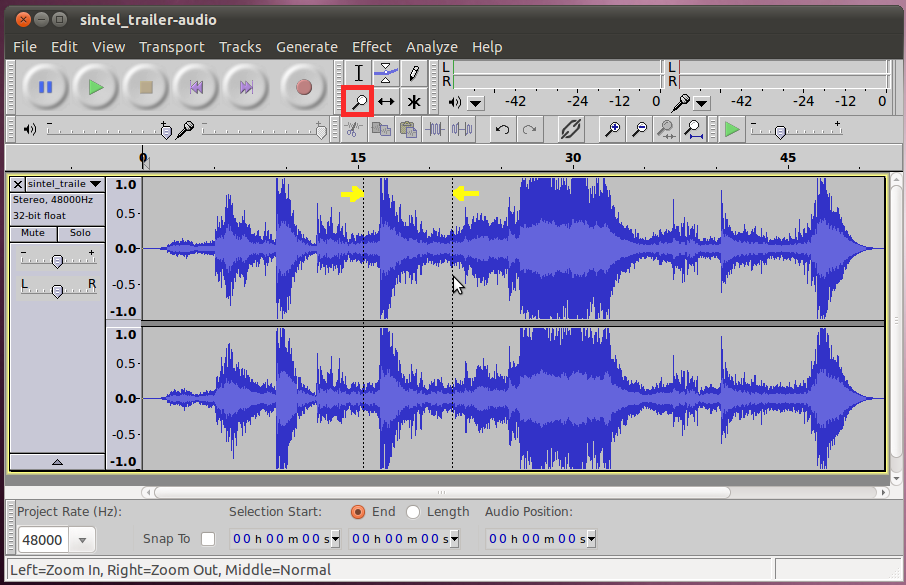
The other way to zoom in and out is to use the zoom tool mode.
You can enter this mode by clicking on the magnifying glass under the
cursor button for the selection mode (just to the right of the record
button). In this mode you can zoom in simply by clicking on a
spot you want to see closer, and zoom out from a spot by left
clicking. To zoom in on a particular selection, right click and
drag across the section, you will see dotted lines for the beginning
and end of the section. Unlike when in selection mode, this will
not create a selection (dark gray) but simply zoom to that area.
Record audio
The other way to get audio into audacity is to record it. First,
lets remove the track we imported previously. Just click the "X"
in the upper left corner of the track's window. Now you should
have a blank audacity window to record into. When you are ready,
push the record button then start talking into your microphone.
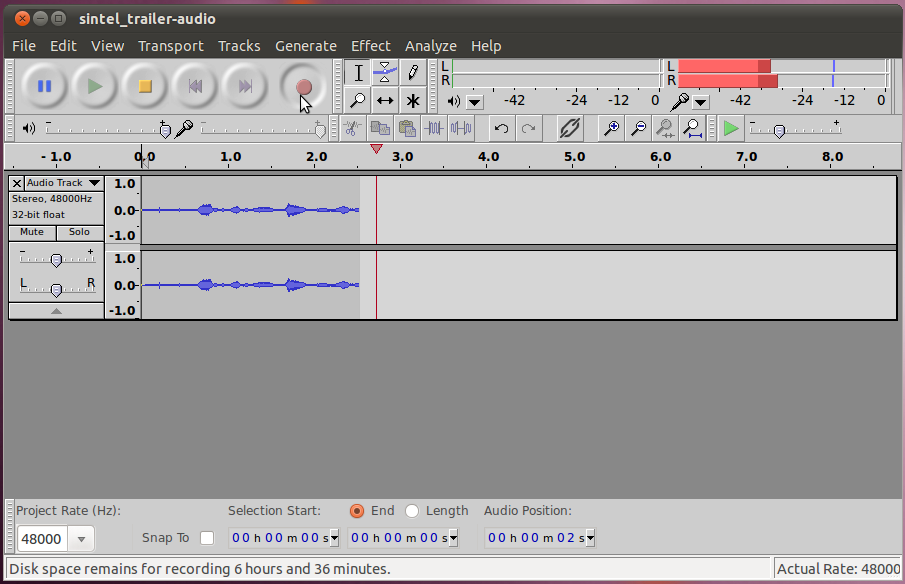
This time you will see the cursor be a bit ahead of the graph showing
the waveform. That is because it takes the computer a short
amount of time to process the audio it is recording and display
it. Be aware that the location of the cursor is where you are at
in the timeline, not where the graph of the waveform is showing
up.
You will also notice that there are two bars (red this time) to the
right of where the volume was displayed during playback. This
shows the level of volume of the audio being recorded at that
instant.
Finally, there is a slider under the record button that allows you to
change the strength that the microphone records at. Unfortunately
if you are running Ubuntu, this won't work. Instead, set this in
the operating system's (not Audacity) Sound Preferences on the Input tab.
Save AUP (AUdacity Project) File
Now that we have the start of an audio project we will want to work
with, we need to save the project so we can open it later. To
save the entire project, go to File -> Save Project As... When
you pick a file name with the .aup extension, audacity will
automatically create a directory (aka folder) at the same location as the .aup file,
with the same name as what is before the .aup. This directory
contains the actual audio data so it is very important.
Do not delete this while trying to cleanup a directory. If you
move the .aup file to a different location, you need to move this
directory as well.
Export Audio Files
At this point we could go on editing our project, adding more audio,
etc. During this process we would be continuously saving the .aup file
(in case our computer crashes). In the end though, we want
to get our final result back out in a format that we can listen to
(WAV, FLAC, OGG-Vorbis, MP3, etc). Unfortunately, AUP files are not
something that you can listen to in a media player, they are a special
audacity format (similar to XCF files for the GIMP). To create
the more normal file types, we will use the "Export" function. Go
to File -> Export and select the type of file you would like from
the drop down on the bottom (FLAC is the recommended format), then
enter a file name and click "Save".