Rotation, Cropping, Re-sizing
Rotating, cropping, and re-sizing are three of the most basic, and
easiest ways you can transform an image to make it match what you need
from it.
For the activities in this section, we
will work with the image you can get from this link here, right
click on the link and save it to your disk.
Rotation
When working with photographs, you will
often come across ones where the photographer wasn't holding the camera
perfectly level while they took the image. This is easy to
correct in the GIMP by rotating the image back in to level.
Once we have the image open, we will select the rotate tool from the
toolbox.
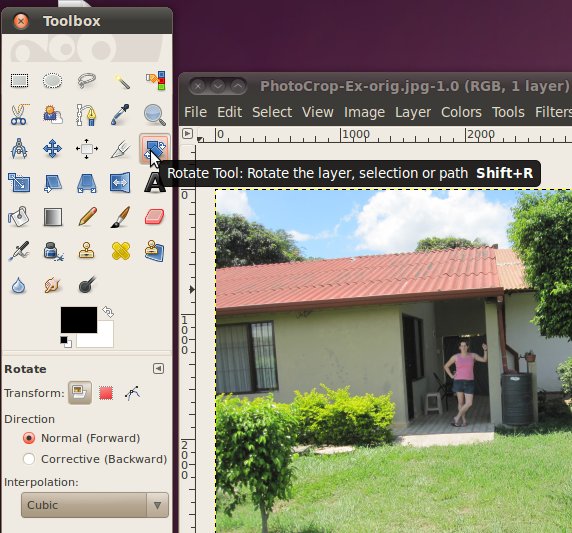
Once you are in the rotate tool, simply
click on the picture and while you are still holding down the mouse
button, move the mouse. This will spin the image around, just
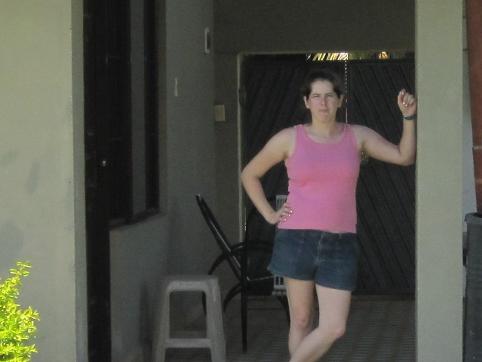
spin it to an orientation that looks correct. The post that the
subject is leaning against should be vertical and the light/shadow line
just under her should be horizontal, but it doesn't have to be exact,
just close enough to look good. If it helps, you can use the zoom
button at the bottom of the image window to zoom in closer on the
subject.
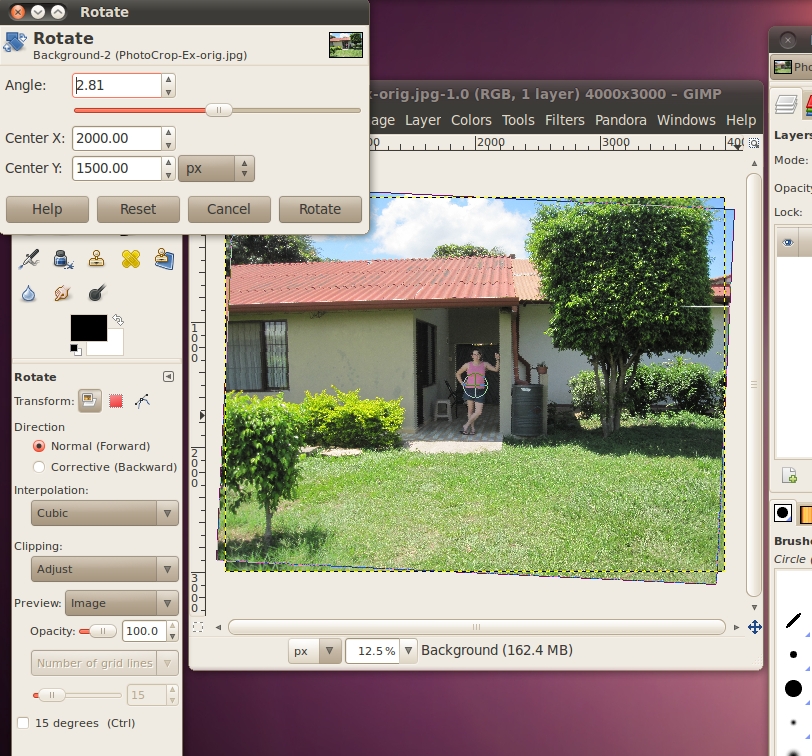
When you are done moving it, and you
like how it looks, click the Rotate button. The GIMP will process the
image for a moment, and then you will have your new, rotated
image! (You can save now to make sure you don't loose your work)
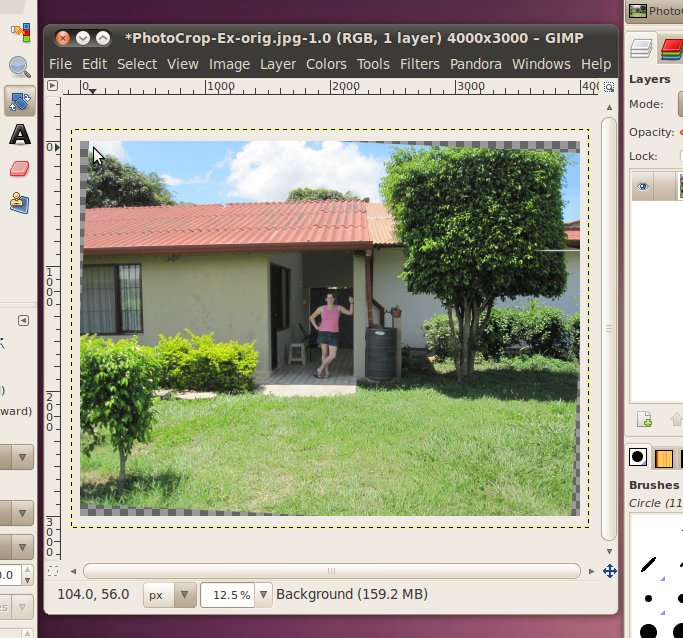
But now we have a bit of a
problem! The image has gray checkered borders! (This gray
checkered pattern is what the GIMP displays when there is nothing
there, it means that those pixels of the image are completely
blank.) Since we took a rectangular image and rotated it while
continuing to display it in a rectangular area, we had gaps appear (and
other areas disappeared). This usually isn't a big problem, if
you are otherwise happy with the image, you can just use the cropping
tool to cut the image down a little bit. However, we're not happy
with the image yet, so we're going to do some other things first...
Cropping
First, the word. In general the
word to "crop" is used in all kinds of publishing, art, graphic design,
photography, etc., it just means to cut the edges off of
something.
There are two main reasons to crop a
photo. The first is the subject only takes up a small area of the
photo. In this case, you can crop the photo down so that the
subject is the majority of what is being shown. The second
important reason to crop an image is to improve the spacing between
various elements in the image. This is a little more complicated
than the first reason. Most amateurs who take photos
incorrectly believe that the picture will look the best when the
subject of the image is directly in the center. However, over the
years artists have figured out that this isn't correct. It is
more pleasing to the human eye when subjects are 1/3 or 2/3 of the way
across or down an image.
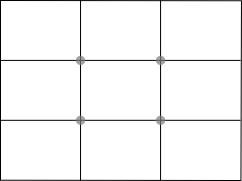
Think of your image in terms of a grid. The ideal locations for a
subject are at the intersections of the lines, represented on this
diagram by gray dots. If that isn't possible, or feasible, then
you can try to line up large features under the vertical and horizontal
lines.
It can often be tricky to figure out what are the subjects, or fit all
the important features in a photo and still use the rule of
thirds.
Don't worry! This isn't an exact science, its just a good rule of
thumb to keep in mind.
For an example, there are two images below. The one on the left
has the large rock outcrop centered in the middle of the image.
The one on the right uses the rule of thirds to put the rock outcrop
1/3 of the way over from the left side. Additionally, the horizon
(where the rocks meet the sky) is 1/3 of the way up from the top and
the parallel clouds take up the top 1/3 of the image.
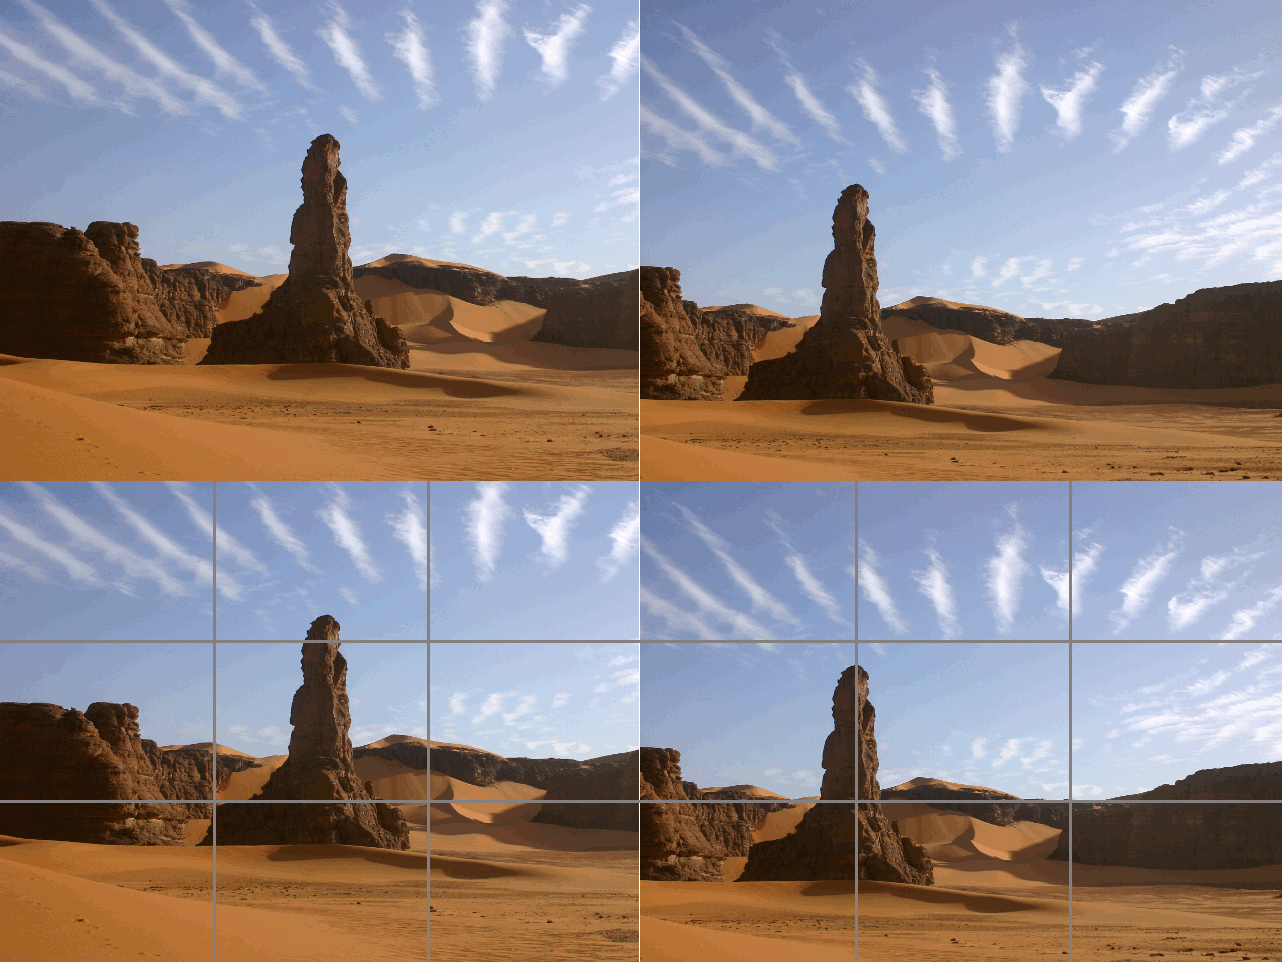
You may notice that the one on the right
feels somewhat more open, and less crowded. It is generally
better to not have crowded photos. Additionally, notice that to
get this less crowded feeling, the size of the features didn't have to
be changed. The rock and the background are the same size in both
images.
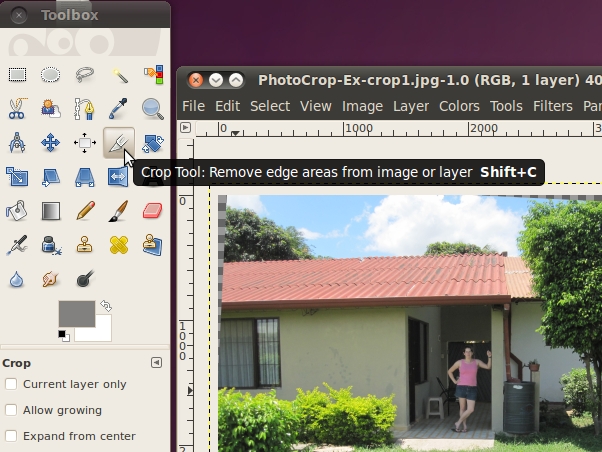
Let's continue with the image we were working on before. To crop,
we will select the crop tool from the toolbox:
We can go ahead and crop the picture down so that just the interesting
stuff in the center around the subject is visible. Move the mouse
to
the upper-left corner of the area you want to be visible. Then
click
the mouse button, and while you are holding it down, move the mouse to
the lower-right corner of the area you want. The GIMP darkens the
area that will be cut-off, so that the clear area will be what remains
after the crop. When you are happy with the area, let go of the
mouse button.
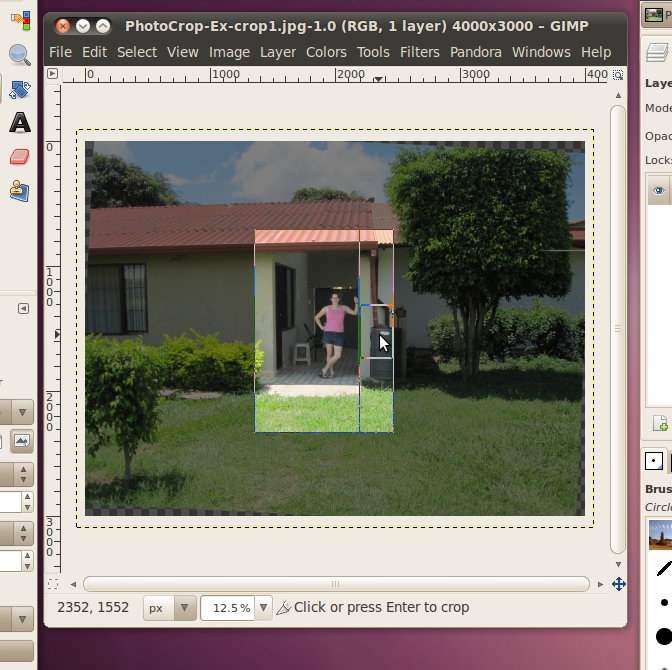
If you then decide you want to change the area some how, you can hover
your mouse button over the area near the edges. It will pop up a
box indicating that you are going to change that edge (works with
corners also, then two edges will move). In the above example, I have
the box up for the right edge of the crop area. To move this
edge, just hold down the mouse button and move it until you are happy
with the new area. When you are done click the mouse button once
somewhere inside the clear area to complete the crop.
But hang on, as was discussed previously, 4:3 is generally a good ratio
for photographs, so it would be nice if the image we had when we were
done
was still 4:3. Luckily the GIMP crop tool has an option that can
be set for just this purpose. We do this in the "Tool Options"
dialog below the toolbox. You may have noticed that when we
selected the crop tool, this dialog automatically changed to the
options for the crop tool. This will happen whenever you select a
new tool, so that the options displayed here always match the tool you
are working with.
We're going to go ahead and check the box in front of "Fixed:" and
select the "Aspect Ratio" option from the box. Then in the text
field just below that line, we will put in the ratio of 4:3.
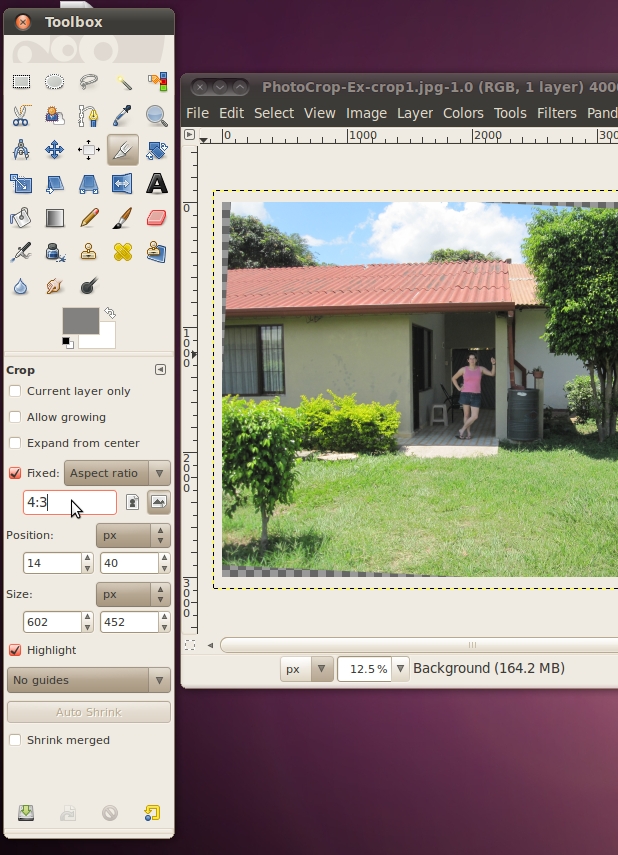
Now, try cropping the image again, to get back to the image one step
before hit the buttons "Ctrl" + "z" one time to undo your previous
crop. (You can also do this in the menu Edit->Undo Crop Image)
You notice that when you move your mouse to select the area that will
be kept, the box is a bit more rigid. With the fixed aspect
ratio, it is not possible to increase one of the sides without
increasing one of the adjacent ones.
Alas, we're not quite done...we haven't used our rule-of-thirds yet on
the area that we're going to crop. Again, The GIMP is there to
help us with this. The crop tool has an option for displaying a
"Guide" that puts lines for the rule of thirds up in your window as you
select your area. To activate it simply select "Rule of thirds"
from the guides selection drop-down in the Crop tool box. (It
probably currently says "No guides" in your tool options)
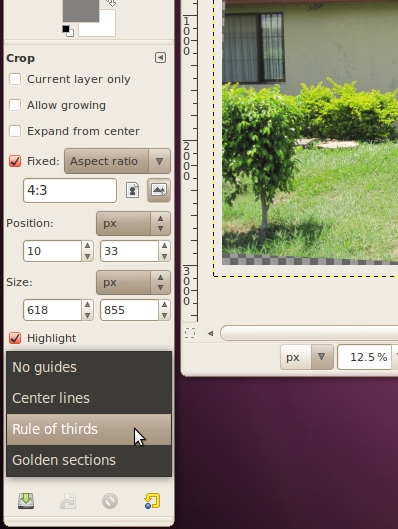
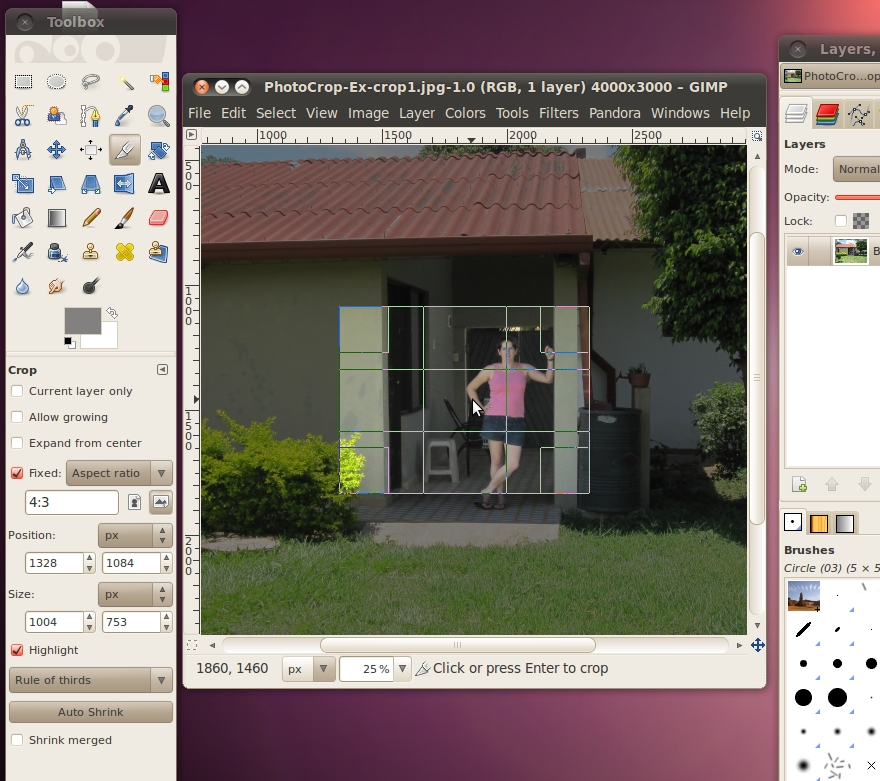
Alright, now we're set for our final try at cropping. If you
currently have an already cropped image on your screen, hit Ctrl+Z
until you get back to the image you had after you rotated it. Now
select an area that has the subject occupying a large part of the area,
is in 4:3 ratio, and uses the rule of thirds and crop it!
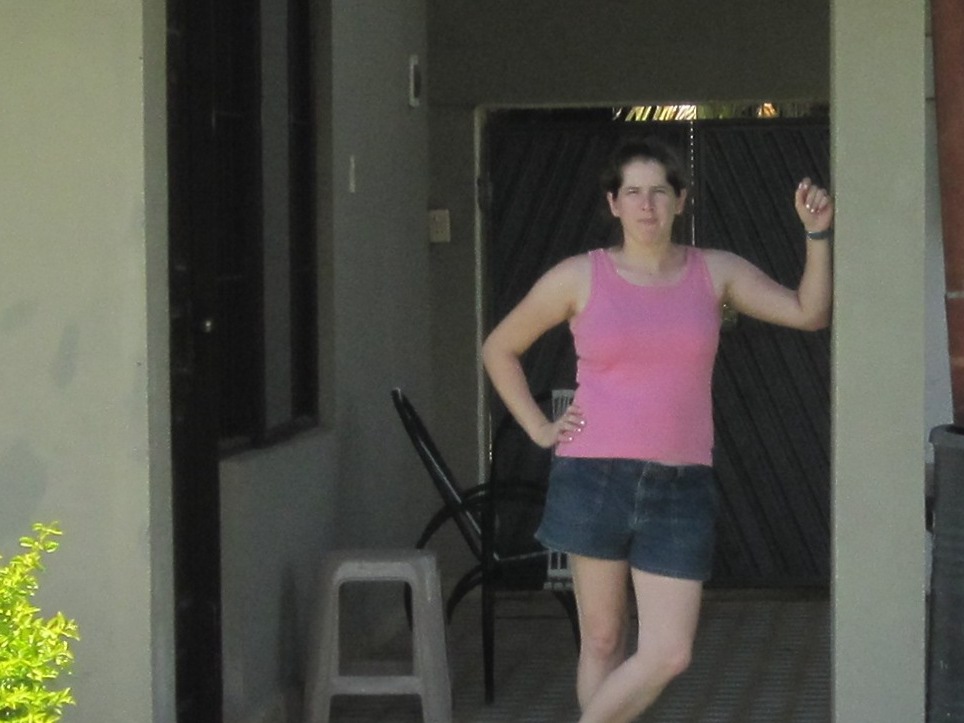
And now we get our final, cropped image:
Re-Sizing
You may have noticed that the image that we just finished with took up
most of your browser window, even after we cropped off a huge part of
it. Since digital cameras these days are capable of taking such
large, high-resolution pictures, this is a fairly common problem when
pictures are used on the web. It is possible to have the site
tell the web browser to shrink the picture and not display it at full
size, but then you still have to transfer the whole picture.
Because the picture is so big, it has to store all those pixels, and
the file size is also big. The above image is 131KB, which isn't
huge, but it can make the site slow to load, especially if you have
lots of pictures like that. Instead, what should be done, is the
image should be re-sized down to be the correct size for
displaying. Changing the size in this manner will not change what
it looks like on the web site (if displayed at the same
resolution). This is different from using the quality selector
when saving the image, as that does change how the image looks (just
hopefully not so the eye can make it out).
A quick note, there is almost never a good reason to re-size a picture
to something larger. When you make it smaller, the program doing
the shrinking can easily take out pixels to make it the correct
size. However, if you were to try to make it larger, it doesn't
know what the pixels in between the current pixels should be to add
in. So what it does is it just guesses, based on what pixels are
around it. This will indeed make it larger, but will also
increase the file size of the image. If you want a larger image
on your web site, that is when it is better for the site to tell the
web browser how big the image should be.
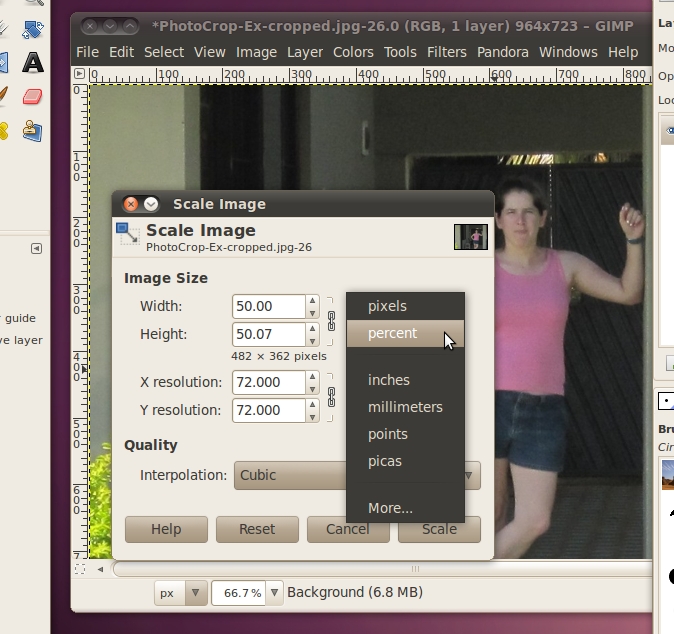
Re-sizing in the GIMP is easy. Just go to Image -> Scale
Image. You will see the Scale Image dialog on the screen.
Now you can input the size you want for an image.
If you have a web site, you may already know exactly how many pixels
you
want the image to be. To do this, you can select "pixels" in the
first drop down box, then put the number of pixels you want for the
width or height. You only have to put one of the values in, and
the GIMP will automatically calculate the other. It is possible
to change them independently (by clicking the little chain between them
to un-link them), but this should almost never be done because it will
cause the image to distort and make it look stretched out.
If you don't already know the exact dimensions you need your image to
be, it is generally easier to re-size it to a percentage of the
original. To do this select "percent" from the first drop down
box, then enter your best get at what percent of the original you want
your new image to be.
If you're happy with your image, you can go ahead and save it. If
you're trying to make it small for a web site, don't forget to adjust
the quality selector to make it as small as you can.
After all that rotating, cropping, and re-sizing, here's the final
image. Its only 24KB, when we started with a 3900KB original!
Attribution


