Selection and Redeye Correction
We have all seen photos in the past where the eyes of the subject(s)
are not their normal color but bright red. There can be various
levels of this ranging from barely detectable to very bright red.
This is caused by light from the flash on the camera reflecting off the
blood vessels on the back of the eye and back to the camera.
For more info, see: http://en.wikipedia.org/wiki/Red-eye_effect
Since this is such a common problem in photographs, the GIMP has a
built in tool for removing it which we will work with in this
section.
First, let's save this
file to your disk, and open it with the GIMP.
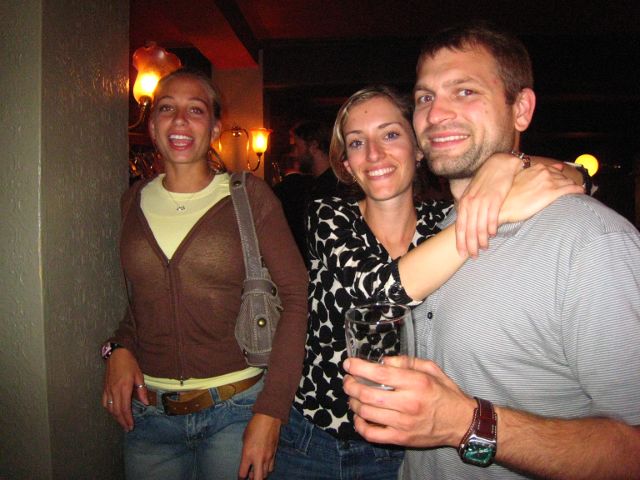
You can see that there are three examples of red eye here. Two
(the woman on the left and the man) have a large amount, and the woman
in the middle just has a little showing.
To correct the red eye, we will run the red eye removal tool. You
can find it under Filters->Enhance->Red Eye Removal.
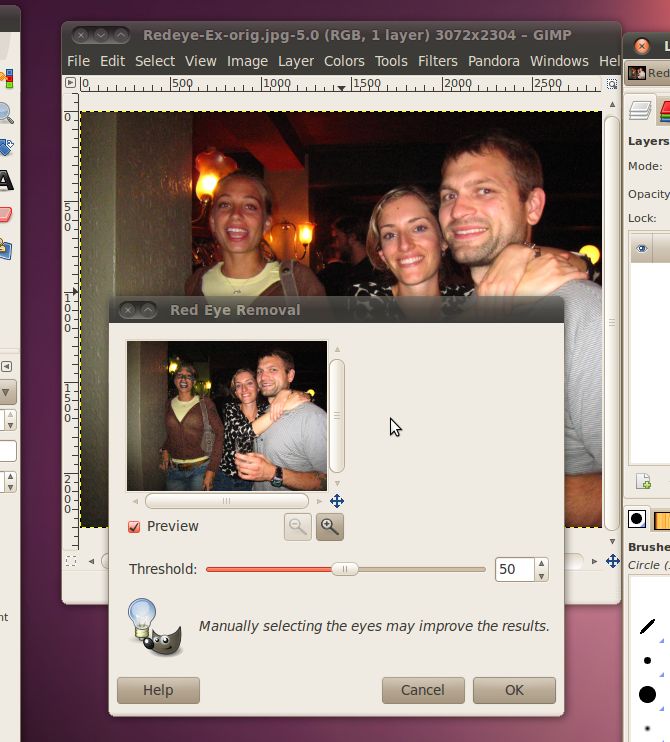
If all works well, you should be able to just click the button and have
it remove all the red eye. Go ahead and try it now.
Ahhhh! What happened!!! It looks like the people have mold
growing on them, this is terrible.
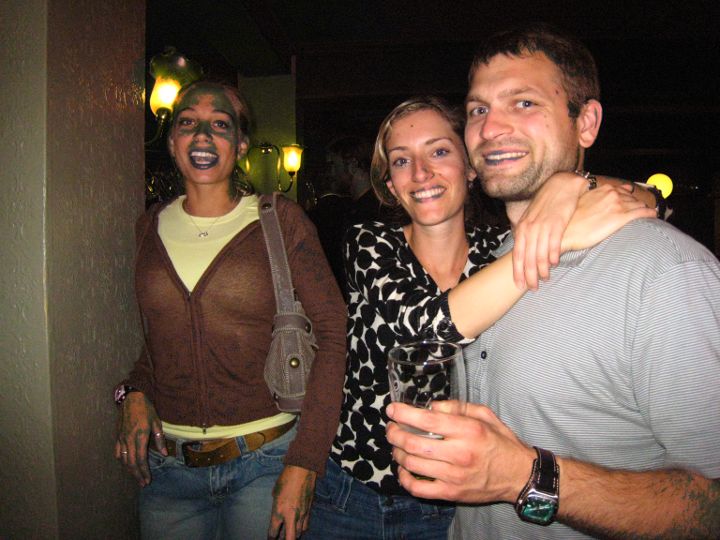
What the tool did was go through the whole photo and find all the spots
where there was a lot of red, and try to remove it. Unfortunately
this photo had lots of spots like that...the people's lips, the woman
on the left's face, the wall in the background, etc. You could
try using the slider to lower the threshold so it doesn't pickup as
much, but that doesn't work very well for this image either, but let's
try it anyway.
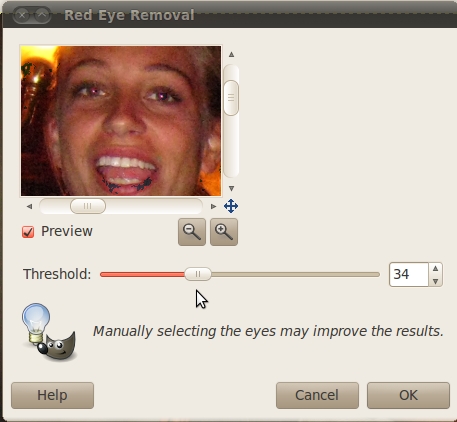
This time let's use the preview window to zoom in on the face of the
woman on the left. As you move the slider around, you will see
that before most of the red from her eyes is gone, there are strange
artifacts showing up on her lips.
Instead of just using this tool, we're going to have to try a different
tactic to fix this image. We're going to use the selection tool
to select just her eyes, then run the red eye tool on just that
selected area. We will soon find that using the selection tool is
very powerful and the ability to select certain areas of photos makes
almost all the things that you can do with the GIMP possible.
Even the cropping that we did in the last section is just a set of
special functionality layered over the selection tool, in fact you can
do all the things we did in the last section by simply making a
selection and then clicking Image -> Crop to selection.
Let's start by selecting the Rectangle Select Tool from the toolbox.
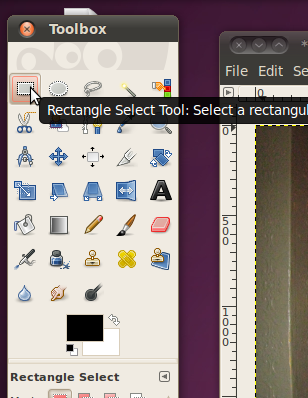
Using this tool is almost exactly the same as using the crop tool,
except when you are done you have a selection of the image, not a
smaller image. Let's use it to create a rectangle around one of
the woman on the left's eyes. Zoom in if you need to, so you
don't select too much else.
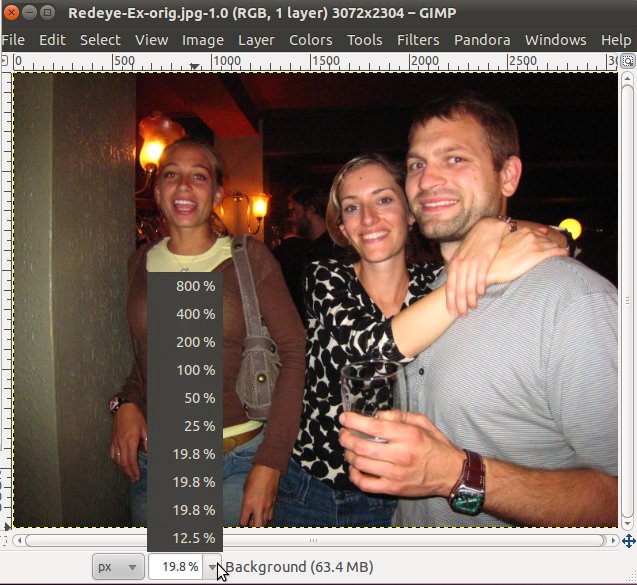
There are several ways to zoom in (and out) in the GIMP, but the
easiest on is probably just to click the zoom box in the bottom bar of
the image window and select the size you want.
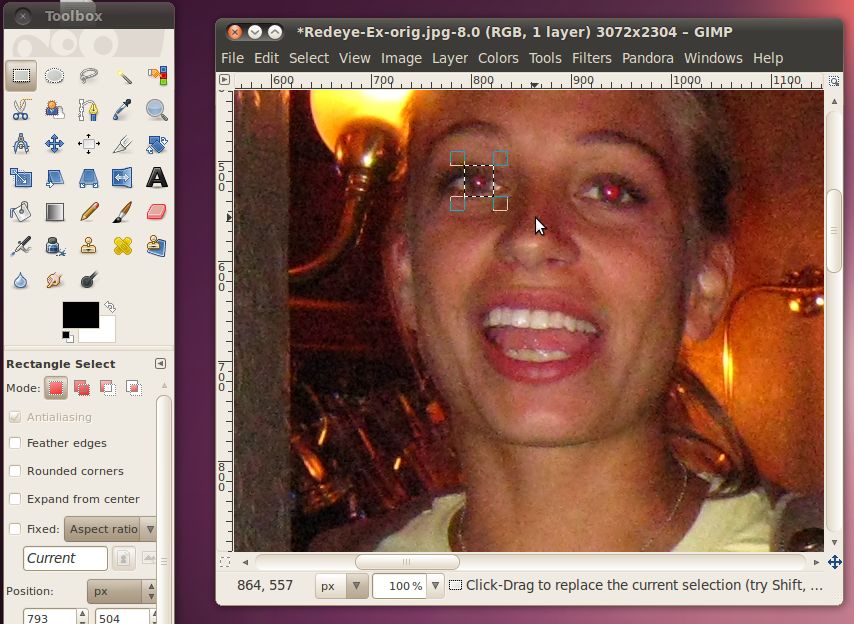
If you now click inside the selection (or hit Enter) the selection will
stick, but you don't need to do this, you can run tools on it even
before it sticks.
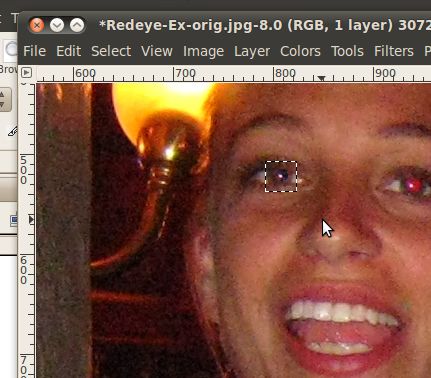
Now let's go back and run the Red eye reduction filter again (Filters
-> Enhance -> Red Eye Removal). This
time we can turn the threshold up a bit higher, because there isn't
much else that is very red in the image.
Now that we've got that down, we can go ahead and do it to the other
five eyes in the image.
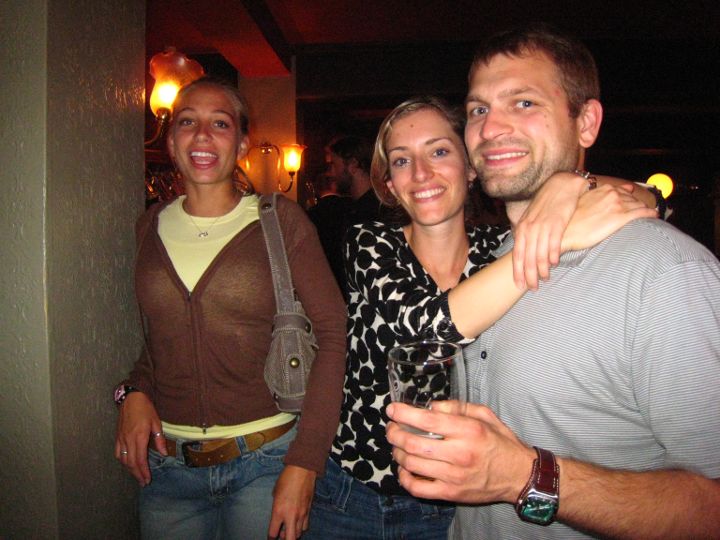
I'd say they are looking much better! Its still not a great
photograph, but at least they don't look like they are possessed by the
devil.
Attribution
Three Friends, Russell Harrison, http://www.flickr.com/photos/rharrison/1467377710/,
CC-BY-SA
Two Dancers, Russell Harrison, http://www.flickr.com/photos/rharrison/1551648804/,
CC-BY-SA
Voo Doo Music Fest, Katrina Szela, http://www.flickr.com/photos/93017934@N00/287761814/,
CC-BY
Mike Roe with Julie and Audrey Quinn, James Emery, http://www.flickr.com/photos/emeryjl/891366632/,
CC-BY


